How to Build a DApp: Complete DApp Architecture
Introduction
Decentralized applications, or DApps, have redefined how applications are built, managed, and interacted with in Web3. By leveraging blockchain technology, DApps provide a secure, transparent, and trustless system that enables peer-to-peer interactions without any central authority. At the core of a DApp's architecture are several main components that work in tandem to create a robust, decentralized ecosystem. These components include smart contracts, nodes, frontend user interfaces, and more.
In this tutorial, you'll come face-to-face with each major component by writing a full DApp that mints tokens. We'll also explore additional optional components of DApps that can enhance user experience for your future projects. You can view the complete project in its monorepo on GitHub.
Checking Prerequisites
To get started, you should have the following:
A Phron account funded with DEV. You can get DEV tokens for testing on Phron once every 24 hours from the Phron Faucet
Node.js version 16 or newer installed
VS Code with Juan Blanco's Solidity extension is a recommended IDE
Understanding of JavaScript and React
Novice familiarity with Solidity. If you are not familiar with writing Solidity, there are many resources out there, including Solidity by Example. A 15-minute skim should suffice for this tutorial
A wallet like MetaMask installed
Nodes and JSON-RPC Endpoints
Generally speaking, a JSON-RPC is a remote procedure call (RPC) protocol that utilizes JSON to encode data. For Web3, they refer to the specific JSON-RPCs that DApp developers use to send requests and receive responses from blockchain nodes, making it a crucial element in interactions with smart contracts. They allow frontend user interfaces to seamlessly interact with the smart contracts and provide users with real-time feedback on their actions. They also allow developers to deploy their smart contracts in the first place!
To get a JSON-RPC to communicate with a Phron blockchain, you need to run a node. But that can be expensive, complicated, and a hassle. Fortunately, as long as you have access to a node, you can interact with the blockchain. Phron has a handful of free and paid node options. For this tutorial, we will be using the Phron's public node for Phron, but you are encouraged to get your own private endpoint.
So now you have a URL. How do you use it? Over HTTPS, JSON-RPC requests are POST requests that include specific methods for reading and writing data, such as eth_call for executing a smart contract function in a read-only manner or eth_sendRawTransaction for submitting signed transactions to the network (calls that change the blockchain state). The entire JSON request structure will always have a structure similar to the following:
This example is getting the balance (in DEV on Phron) of the 0xf24FF3a9CF04c71Dbc94D0b566f7A27B94566cac account. Let's break down the elements:
jsonrpc— the JSON-RPC API version, usually "2.0"id— an integer value that helps identify a response to a request. Can usually just keep it as `method— the specific method to read/write data from/to the blockchain. You can see many of the RPC methods on our docs siteparams— an array of the input parameters expected by the specificmethod
There are also additional elements that can be added to JSON-RPC requests, but those four will be seen the most often.
Now, these JSON-RPC requests are pretty useful, but when writing code, it can be a hassle to create a JSON object over and over again. That's why there exist libraries that help abstract and facilitate the usage of these requests. Phron provides documentation on many libraries, and the one that we will be using in this tutorial is Ethers.js. Just understand that whenever we interact with the blockchain through the Ethers.js package, we're really using JSON-RPC!
Smart Contracts
Smart contracts are self-executing contracts with the terms of the agreement directly written into code. They serve as the decentralized backend of any DApp, automating and enforcing the business logic within the system.
If coming from traditional web development, smart contracts are meant to replace the backend with important caveats: the user must have the native currency (GLMR, MOVR, DEV, etc.) to make state-changing requests, storing information can be expensive, and no information stored is private.
When you deploy a smart contract onto Phron, you upload a series of instructions that can be understood by the EVM, or the Ethereum Virtual Machine. Whenever someone interacts with a smart contract, these transparent, tamper-proof, and immutable instructions are executed by the EVM to change the blockchain's state. Writing the instructions in a smart contract properly is very important since the blockchain's state defines the most crucial information about your DApp, such as who has what amount of money.
Since the instructions are difficult to write and make sense of at a low (assembly) level, we have smart contract languages such as Solidity to make it easier to write them. To help write, debug, test, and compile these smart contract languages, developers in the Ethereum community have created developer environments such as Hardhat and Foundry. Phron's developer site provides information on a plethora of developer environments.
This tutorial will use Hardhat for managing smart contracts.
Create a Hardhat Project
You can initialize a project with Hardhat using the following command:
When creating a JavaScript or TypeScript Hardhat project, you will be asked if you want to install the sample project's dependencies, which will install Hardhat and the Hardhat Toolbox plugin. You don't need all of the plugins that come wrapped up in the Toolbox, so instead you can install Hardhat, Ethers, and the Hardhat Ethers plugin, which is all you'll need for this tutorial:
Before we start writing the smart contract, let's add a JSON-RPC URL to the config. Set the hardhat.config.js file with the following code, and replace INSERT_YOUR_PRIVATE_KEY with your funded account's private key.
Write Smart Contracts
Recall that we're making a DApp that allows you to mint a token for a price. Let's write a smart contract that reflects this functionality!
Once you've initialized a Hardhat project, you'll be able to write smart contracts in its contracts folder. This folder will have an initial smart contract, likely called Lock.sol, but you should delete it and add a new smart file called MintableERC20.sol.
The standard for tokens is called ERC-20, where ERC stands for "Ethereum Request for Comment". A long time ago, this standard was defined, and now most smart contracts that work with tokens expect tokens to have all of the functionality defined by ERC-20. Fortunately, you don't have to know it from memory since the OpenZeppelin smart contract team provides us with smart contract bases to use.
Install OpenZeppelin smart contracts:
Now, in your MintableERC20.sol, add the following code:
When writing smart contracts, you're going to have to compile them eventually. Every developer environment for smart contracts will have this functionality. In Hardhat, you can compile with:
Everything should compile well, which should cause two new folders to pop up: artifacts and cache. These two folders hold information about the compiled smart contracts.
Let's continue by adding functionality. Add the following constants, errors, event, and function to your Solidity file:
This function will allow a user to send the native Phron currency (like GLMR, MOVR, or DEV) as value because it is a payable function. Let's break down the function section by section.
It will figure out how much of the token to mint based on the value sent
Then it will check to see if the amount minted is 0 or if the total amount minted is over the
MAX_TO_MINT, giving a descriptive error in both casesThe contract will then forward the value included with the function call to the owner of the contract (by default, the address that deployed the contract, which will be you)
Finally, tokens will be minted to the user, and an event will be emitted to pick up on later
To make sure that this works, let's use Hardhat again:
You've now written the smart contract for your DApp! If this were a production app, we would write tests for it, but that is out of the scope of this tutorial. Let's deploy it next.
Deploy Smart Contracts
Under the hood, Hardhat is a Node project that uses the Ethers.js library to interact with the blockchain. You can also use Ethers.js in conjunction with Hardhat's tool to create scripts to do things like deploy contracts.
Your Hardhat project should already come with a script in the scripts folder, called deploy.js. Let's replace it with a similar, albeit simpler, script.
This script uses Hardhat's instance of the Ethers library to get a contract factory of the MintableERC20.sol smart contract that we wrote earlier. It then deploys it and prints the resultant smart contract's address. Very simple to do with Hardhat and the Ethers.js library, but significantly more difficult using just JSON-RPC!
Let's run the contract on Phron (whose JSON-RPC endpoint we defined in the hardhat.config.js script earlier):
You should see an output that displays the token address. Make sure to save it for use later!
Challenge
Hardhat has a poor built-in solution for deploying smart contracts. It doesn't automatically save the transactions and addresses related to the deployment! This is why the hardhat-deploy package was created. Can you implement it yourself? Or can you switch to a different developer environment, like Foundry?
Create a DApp Frontend
Frontends provide an interface for users to interact with blockchain-based applications. React, a popular JavaScript library for building user interfaces, is often used for developing DApp frontends due to its component-based architecture, which promotes reusable code and efficient rendering. The useDApp package, an Ethers.js based React framework for DApps, further simplifies the process of building DApp frontends by providing a comprehensive set of hooks and components that streamline the integration of Ethereum blockchain functionality.
NoteTypically, a larger project will create separate GitHub repositories for their frontend and smart contracts, but this is a small enough project to create a monorepo.
Create a React Project with useDapp
Let's set up a new React project and install dependencies, which we can create within our Hardhat project's folder without much issue. The create-react-app package will create a new frontend directory for us:
If you remember, Ethers.js is a library that assists with JSON-RPC communication. The useDApp package is a similar library that uses Ethers.js and formats them into React hooks so that they work better in frontend projects. We've also added two MUI packages for styling and components.
Let's set up the App.js file located in the frontend/src directory to add some visual structure:
You can start the React project by running the following command from within the frontend directory:
NoteAt this point, you may see a couple compilation warnings, but as we continue to build the DApp, we'll make changes that will resolve the warnings.
Your frontend will be available at localhost:3000.
At this point, our frontend project is set up well enough to start working on the functional code!
Providers, Signers, and Wallets
The frontend communicates with the blockchain using JSON-RPC, but we will be using Ethers.js. When using JSON-RPC, Ethers.js likes to abstract degrees of interaction with the blockchain into objects, such as providers, signers, and wallets.
Providers are the bridge between the frontend user interface and the blockchain network, facilitating communication and data exchange. They abstract the complexities of interacting with the blockchain, offering a simple API for the frontend to use. They are responsible for connecting the DApp to a specific blockchain node, allowing it to read data from the blockchain, and essentially contain the JSON-RPC URL.
Signers are a type of provider that contain a secret that can be used to sign transactions with. This allows the frontend to create transactions, sign them, and then send them with eth_sendRawTransaction. There are multiple types of signers, but we're most interested in wallet objects, which securely store and manage users' private keys and digital assets. Wallets such as MetaMask facilitate transaction signing with a universal and user-friendly process. They act as a user's representation within the DApp, ensuring that only authorized transactions are executed. The Ethers.js wallet object represents this interface within our frontend code.
Typically, a frontend using Ethers.js will require you to create a provider, connect to the user's wallet if applicable, and create a wallet object. This process can become unwieldy in larger projects, especially with the number of wallets that exist other than MetaMask.
Fortunately, we have installed the useDApp package, which simplifies many of the processes for us. This simultaneously abstracts what Ethers is doing as well, which is why we took a bit of time to explain them here.
Create a Provider
Let's do a bit of setup with the useDApp package. First, in your React frontend's index.js file, which is located in the frontend/src directory, add a DAppProvider object and its config. This essentially acts as the Ethers.js provider object, but can be used throughout your entire project by useDApp hooks:
Connect to a Wallet
Now in your App.js file, let's add a button that allows us to connect to MetaMask. We don't have to write any code that's wallet-specific, fortunately, since useDApp does it for us with the useEthers hook.
Now there should be a button in the top right of your screen that connects your wallet to your frontend! Next, let's find out how we can read data from our smart contract.
Read Data from Smart Contracts
Reading from contracts is quite easy, as long as we know what we want to read. For our application, we will be reading the maximum amount of tokens that can be minted and the number of tokens that have already been minted. This way, we can display to our users how many tokens can still be minted and hopefully invoke some FOMO...
If you were just using JSON-RPC, you would use eth_call to get this data, but it's quite difficult to do this since you have to encode your requests in a non-straightforward method called ABI encoding. Fortunately, Ethers.js allows us to easily create objects that represent contracts in a human-readable way, so long as we have the ABI of the contract. And we have the ABI of the MintableERC20.sol contract, MintableERC20.json, within the artifacts directory of our Hardhat project!
So let's start by moving the MintableERC20.json file into our frontend directory. Every time you change and recompile the smart contract, you'll have to update the ABI in the frontend as well. Some projects will have developer setups that automatically pull ABIs from the same source, but in this case we will just copy it over:
Now that we have the ABI, we can use it to create a contract instance of MintableERC20.sol, which we'll use to retrieve token data.
Create a Smart Contract Instance
Let's import the JSON file and the Ethers Contract object within App.js. We can create a contract object instance with an address and ABI, so replace INSERT_CONTRACT_ADDRESS with the address of the contract that you copied back when you deployed it:
Interact with the Contract Interface to Read Supply Data
And let's create a new SupplyComponent within a new SupplyComponent.js file, which will use the contract interface to retrieve the token supply data and display it:
Notice that this component uses the useCall hook provided by the useDApp package. This call takes in the contract object we created earlier, a string method, and any relevant arguments for the read-only call and returns the output. While it required some setup, this one-liner is a lot simpler than the entire use_call RPC call that we would have had to do if we weren't using Ethers.js and useDApp.
Also note that we're using a utility format called formatEther to format the output values instead of displaying them directly. This is because our token, like gas currencies, is stored as an unsigned integer with a fixed decimal point of 18 figures. The utility function helps format this value into a way that we, as humans, expect.
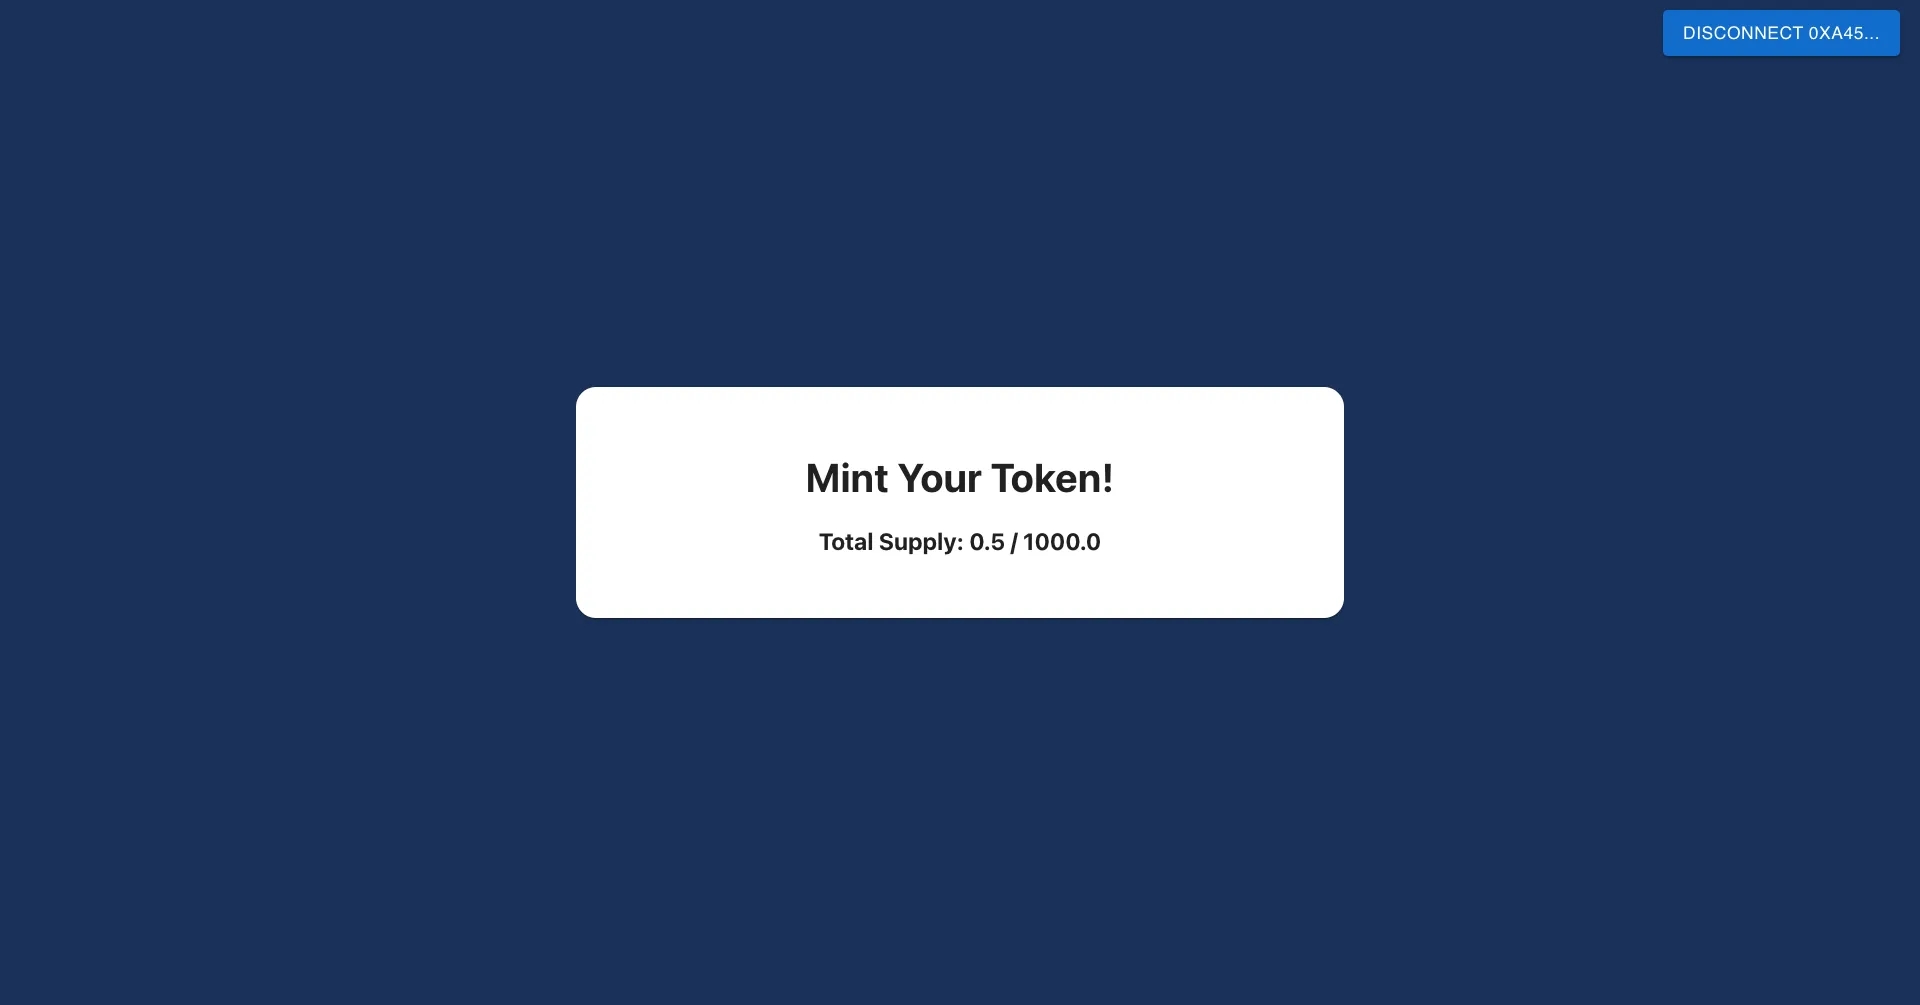
Now we can spice up our frontend and call the read-only functions in the contract. We'll update the frontend so that we have a place to display our supply data:
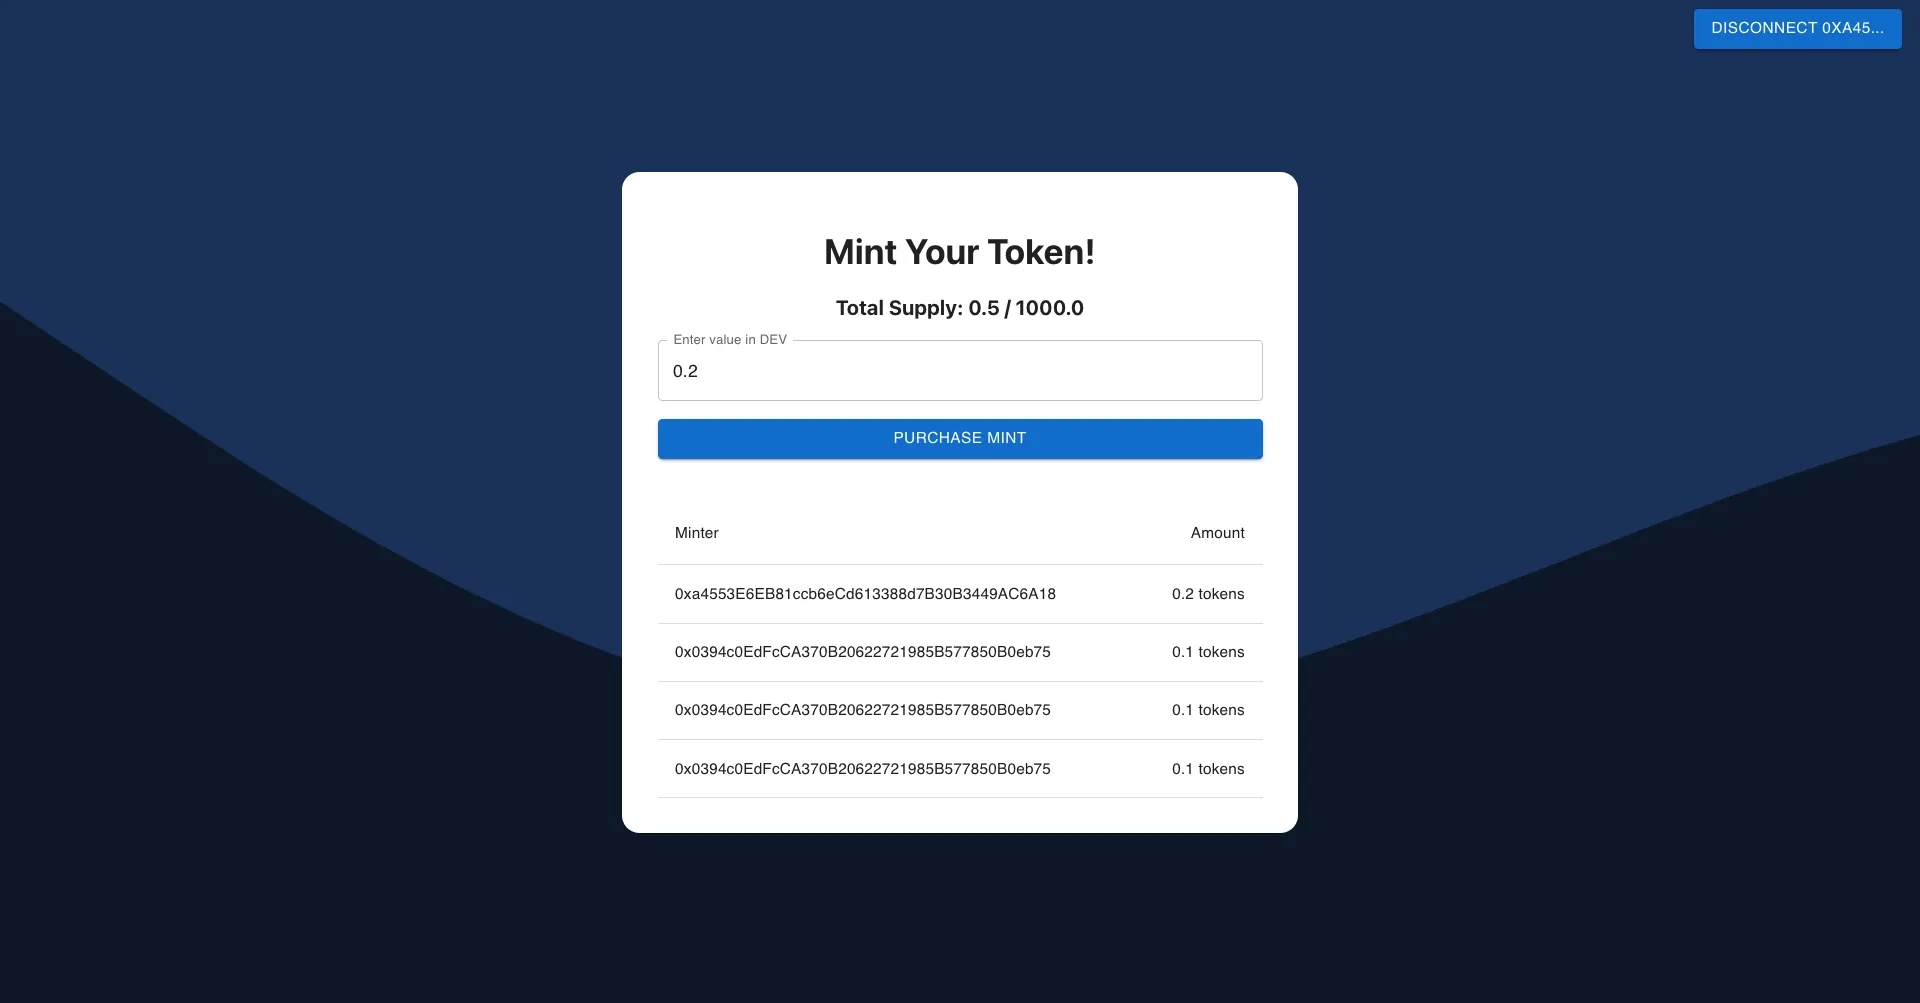
Our frontend should now display the correct data!
Challenge
There's additonal information that could be helpful to display, such as the amount of tokens that the connected account currently has: balanceOf(address). Can you add that to the frontend yourself?
Send Transactions
Now for the most important part of all DApps: the state-changing transactions. This is where money moves, where tokens are minted, and value passes.
If you recall from our smart contract, we want to mint some tokens by calling the purchaseMint function with some native currency. So we're going to need:
A text input that lets the user specify how much value to enter
A button that lets the user initiate the transaction signature
Let's create a new component called MintingComponent in a new file called MintingComponent.js. First, we'll tackle the text input, which will require us to add the logic to store the number of tokens to mint and a text field element.
Next, we'll need to create the button to send the transaction, which will call the purchaseMint of our contract. Interacting with the contract will be a bit more difficult since you're likely not as familiar with it. We've already done a lot of setup in the previous sections, so it doesn't actually take too much code:
Let's break down the non-JSX code a bit:
The user's account information is being retrieved via
useEthers, which can be done because useDApp provides this information throughout the entire projectThe
useContractFunctionhook from useDApp is used to create a function,send, that will sign and send a transaction that calls thepurchaseMintfunction on the contract defined by thecontractobjectAnother function,
handlePurchaseMint, is defined to help inject the native gas value defined by theTextFieldcomponent into thesendfunction. It first checks if the user has their wallet connected to Phron, and if not, it prompts the user to switch networksA helper constant will determine whether or not the transaction is still in the
Miningphase, that is, it hasn't finished
Now let's look at the visual component. The button will call the handlePurchaseMint on press, which makes sense. The button will also be disabled while the transaction happens and if the user hasn't connected to the DApp with their wallet (when the account value isn't defined).
This code essentially boils down to using the useContractFunction hook in conjunction with the contract object, which is a lot simpler than what it does under the hood! Let's add this component to the main App.js file.
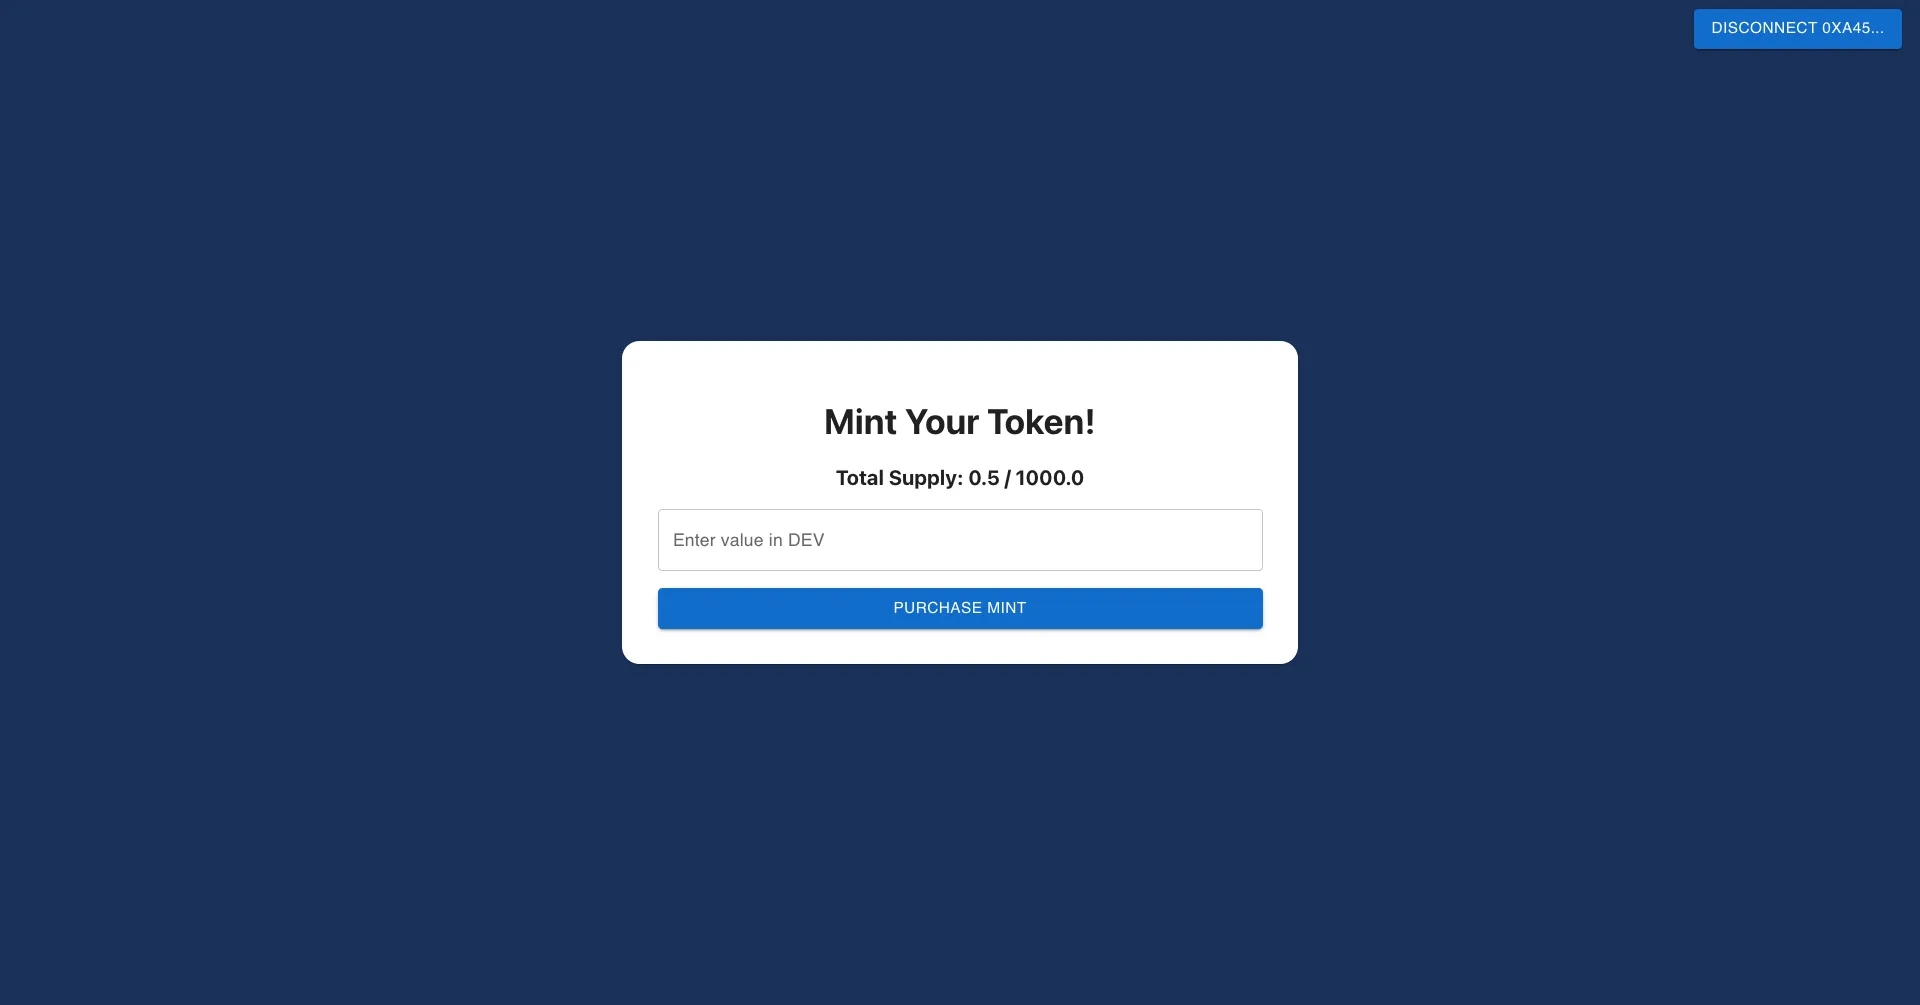
If you try entering a value like 0.1 and press the button, a MetaMask prompt should occur. Try it out!
Read Events from Contracts
A common way of listening to what happened in a transaction is through events, also known as logs. These logs are emitted by the smart contract through the emit and event keywords and can be very important in a responsive frontend. Often, DApps will use toast elements to represent events in real-time, but for this DApp, we will use a simple table.
We created an event in our smart contract: event PurchaseOccurred(address minter, uint256 amount), so let's figure out how to display its information in the frontend.
Let's create a new component PurchaseOccurredEvents within a new file PurchaseOccurredEvents.js that reads the last five logs and displays them in a table:
This component so far creates an empty table, so let's use two new hooks to read those logs:
Here's what happens in this code:
The block number is received from the
useBlockNumberhook, similar to using the JSON-RPC methodeth_blockNumberA filter is created to filter for all events with any arguments on the contract injected into the component with the event name
PurchaseOccurredLogs are queried for via the
useLogshook, similar to using theeth_getLogsJSON-RPC method. Note that we're only querying the last 10,000 blocks because otherwise the entire history of the blockchain would be queried and the RPC would timeoutThe resultant logs are parsed, and the most recent five are selected
If we want to display them, we can do it like so:
This too should be added to App.js.
And, if you've done any transactions, you'll see that they'll pop up!
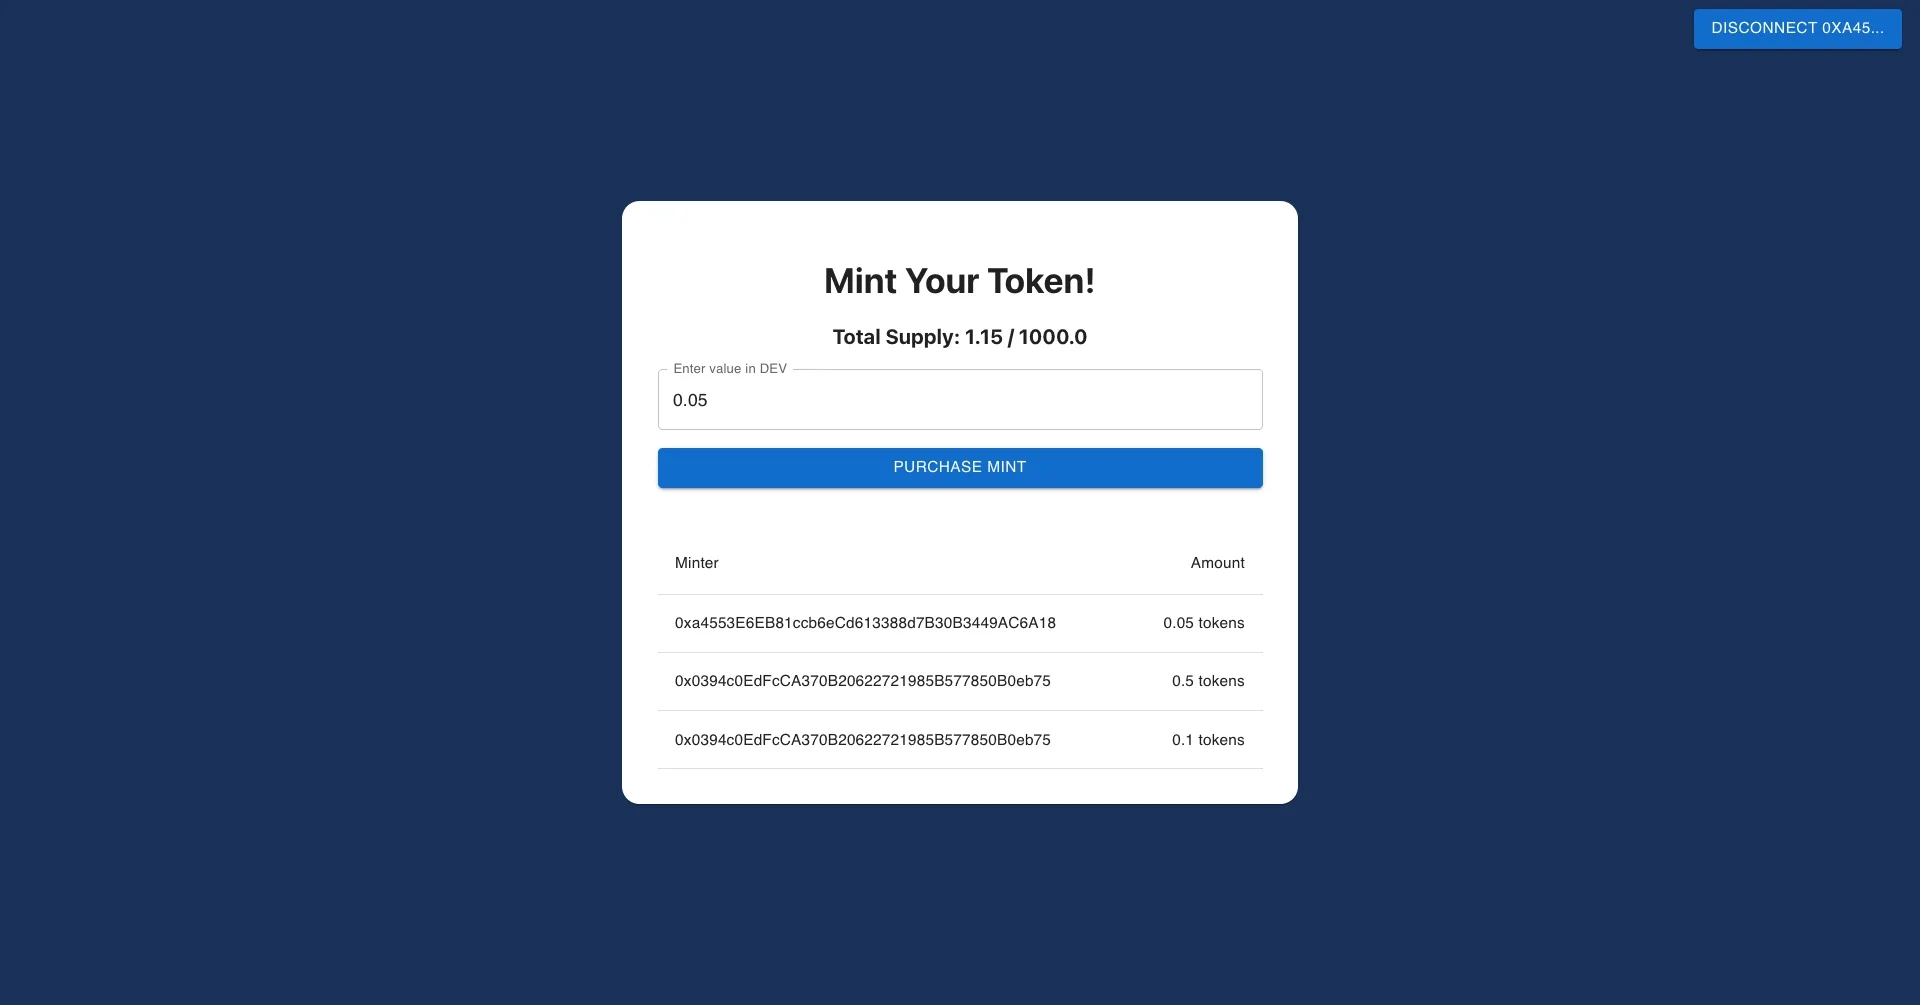
Now you've implemented three main components of DApp frontends: reading from storage, sending transactions, and reading logs. With these building blocks as well as the knowledge you gained with smart contracts and nodes, you should be able to cover 80% of DApps.
You can view the complete example DApp on GitHub.
Conclusion
In this tutorial, we covered a wide range of topics and tools essential for successful DApp development. We started with Hardhat, a powerful development environment that simplifies the process of writing, testing, and deploying smart contracts. Ethers.js, a popular library for interacting with Ethereum nodes, was introduced to manage wallets and transactions.
We delved into the process of writing smart contracts, highlighting best practices and key considerations when developing on-chain logic. The guide then explored useDApp, a React-based framework, for creating a user-friendly frontend. We discussed techniques for reading data from contracts, executing transactions, and working with logs to ensure a seamless user experience.
Of course, there are more advanced (but optional) components of DApps that have popped up over time:
Decentralized storage protocols — systems that store websites and files in a decentralized way
Oracles — third-party services that provide external data to smart contracts within blockchains
Indexing protocols — middleware that processes and organizes blockchain data, allowing it to be efficiently queried
An excellent Web2 to Web3 blogpost is available if you are interested in hearing about them in depth.
Hopefully, by reading this guide, you'll be well on your way to creating novel DApps on Phron!
This tutorial is for educational purposes only. As such, any contracts or code created in this tutorial should not be used in production.The information presented herein has been provided by third parties and is made available solely for general information purposes. Phron does not endorse any project listed and described on the Phron Doc Website (https://docs.Phron.ai/). Phron does not warrant the accuracy, completeness or usefulness of this information. Any reliance you place on such information is strictly at your own risk. Phron disclaims all liability and responsibility arising from any reliance placed on this information by you or by anyone who may be informed of any of its contents. All statements and/or opinions expressed in these materials are solely the responsibility of the person or entity providing those materials and do not necessarily represent the opinion of Phron. The information should not be construed as professional or financial advice of any kind. Advice from a suitably qualified professional should always be sought in relation to any particular matter or circumstance. The information herein may link to or integrate with other websites operated or content provided by third parties, and such other websites may link to this website. Phron has no control over any such other websites or their content and will have no liability arising out of or related to such websites or their content. The existence of any such link does not constitute an endorsement of such websites, the content of the websites, or the operators of the websites. These links are being provided to you only as a convenience and you release and hold Phron harmless from any and all liability arising from your use of this information or the information provided by any third-party website or service.
Last updated